Pages

Monday, December 17, 2007

Baked Chocolate Mousse

Mousse is one of those desserts that can be made a myriad of ways and comes in all kinds of different forms. Some don't like to make (or eat) it because of uncooked eggs in the mix but, I found this baked version that puts that fear to rest.

The mousse mixture contains sugar, chocolate, eggs and butter. This concoction is combined and poured into a round baking pan. It is then placed in a bain-marie in the oven. I was not sure what to expect texture-wise. Would it be runny, soft or firm when it came out?

After 40 minutes it was finished and was solid. I let it cool and inverted it onto a cake plate and placed it in the refrigerator since we weren't going to eat it that night. I did, however, sneak a small taste and the texture was smooth and not too sweet but I wasn't entirely convinced I liked it.

The next day the mousse tasted fabulous. It was like dense chocolate cake with the texture of a cheesecake. It was moist but a little crumbly and melted on the tongue. The mousse sliced like a dream as well. I was pleasantly surprised that my family liked it and asked for seconds. It was not quite as sweet as it should have been since I had to substitute some of the semisweet with unsweetened. After adding a generous dollop of cinnamon whipped cream and I had a impressive, yet easy to prepare, dessert.

Recipe: Baked Chocolate Mousse

Tuesday, December 11, 2007

Menu For Hope 4 (CA04)

Menu For Hope is here once again. For those of you who don't know, Menu For Hope is an annual online raffle created by Pim that benefits humanitarian causes around the world. This year the beneficiary is once again the United Nations World Food Program, specifically the school lunch program in Lesotho, Africa.

The raffle runs from December 10 to 21 and you can see the complete list of prizes at Chez Pim. This year I am donating a one year subscription to one of my most favourite magazines - Canadian Living. CL is known for their fabulous "Tested til Perfect" recipes, informative articles and crafting ideas. I have had a subscription since 2000 and I know that whoever wins this prize will not be disappointed!

If you would like to buy a ticket for this prize, the code is CA 04. To see the entire list of great Canadian prizes, please visit the Domestic Goddess.
Donation/ticket buying instructions:

1. Choose a prize (or prizes) from the master list. (Chez Pim's blog)

2. Go to the donation site. (Firstgiving)

3. Please specify which prize you'd like in the 'Personal Message' section in the donation form when confirming your donation. You must write in how many tickets per prize, and please use the prize code (for example CA04).

Each $10 you donate will give you one raffle ticket toward a prize of your choice. For example, a donation of $50 can be 2 tickets for CA01 and 3 tickets for CA02. Please write 2xCA01, 3xCA02

4. If your company matches your charity donation, please check the box and fill in the information so we could claim the corporate match.

5. Please check the box to allow us to see your email address so that we could contact you in case you win. Your email address will not be shared with anyone.

Check Chez Pim on Wednesday Jaunary 9th, 2008 for the results of the raffle.

* N.B: Canadian tax laws prohibit charitable donation receipts to be issued by registered Canadian charities for raffle or lottery tickets. The UNWFP is a U.S.-based charity; should any donation receipts issued, you should seek the advice of a professional regarding applying them to your Canadian income tax return.

Wednesday, December 05, 2007

Tender Sugar Cookies

The holiday season would not be complete without sugar cookies on the dessert menu. They're one of the most versatile cookies out there - they can be shaped into anything you desire or simply rolled in sugar or decorated with icing.

The sugar cookie recipe I used is from BHG and I liked it because there was no chilling time required. I don't mind making rolled cookie-cutter cookies but sometimes you just don't have time to wait. The dough is straightforward and I was able to make the cookies immediately, though if you need to, refrigerating them is not a problem.

An important thing to remember when rolling the dough into balls is to not use too much force or 'smush' the dough unnecessarily. This will usually result in tougher cookies that are missing a tender crumb texture. Afterwards, I (quite liberally) rolled the balls in different coloured sugars just for fun and visual interest.

The cookies also bake at a lower temperature for a longer time (sort of like shortbread) so they come out very lightly browned on the bottom and melt in your mouth delicious. They're perfect to make with kids (or anyone who loves sprinkles) and are easy enough for the most novice of bakers so give them a try. Happy Baking!

Recipe: Tender Sugar Cookies

Monday, November 26, 2007

Daring Bakers November Challenge - Tender Potato Bread

This month the Daring Bakers challenged themselves to make Potato Bread. You may think that this doesn't sound particularly hard or exciting, but I assure you that would be an incorrect assumption.

The lovely Tanna of My Kitchen in Half Cups chose this recipe so that we'd be able to expand our baking horizons and use new ingredients. I have never baked with potatoes so I was looking forward to see how the bread would turn out. After reviewing the recipe I got to work and didn't leave it to the last minute like I usually do.

First of all, the dough turned out very soft and sticky. I ended up adding 7 and a half cups of flour to get a nice dough consistency. I let it proof in my oven and unfortunately didn't use a big enough bowl because when I came back after the first rise, the dough was exploding over the sides. Be aware that the recipe makes a lot of dough.

I had enough dough to make a 9 x 13-inch pan holding 12 buns and two 9-inch round focaccia breads. Sadly, I don't have a picture of the latter since they got eaten first. I added some shredded cheese to the bun tops and baked them up. Let me just say, the bread was wonderful.

The potato bread had a chewy texture and a crispy crust. It definitely didn't taste like regular white bread but it didn't taste like potatoes either. The buns rose so high that you were full after just one. I used them to eat with chili and turned the rest into breakfast egg and cheese sandwiches. It was a winner and I didn't have any problems with potato weights or the yeast. I would, however, make less next time.

For the complete recipe, please visit Tanna and for all the many talented creations made by my fellow Daring Bakers, check out the blogroll.

Wednesday, November 21, 2007

Quick Orange Buns

I've wanted to make these buns forever but each time I tried to, I never had oranges. I don't always buy them because I don't like peeling them. (I know, that's pretty lame.) Our fruit basket usually has apples, pears and bananas - easy fruit. However, on the last shopping trip I bought a mesh bag of oranges because in November there isn't a lot of in-season fruit to choose from.

These buns are made from a scone-type dough with the addition of eggs. It is soft and I didn't add too much extra flour so they wouldn't become tough. Kneading it was sticky business but it shaped into a square really well. The orange sugar mixture you use to fill the buns was a little excessive as a lot of it leaked out the sides. I believe that perhaps this was done on purpose to create a caramelized filling however I would reduce it next time.

Rolling the dough took some patience and coaxing. Soft dough + lots of sugar = sighs of frustration. The final product does not look remotely rolled. They do taste really yummy though. The sugar gives the top a nice sweet crunch and the bun itself is fluffy, like a homemade tea biscuit. I'm sure that they would have been even better had the sugar not leaked out the bottom of my tube pan and filled the oven with smoke. Baking the buns in a tube pan makes a pretty ring that can be pulled apart and eaten with a pat of butter or drizzled with an icing sugar glaze.

Recipe: Quick Orange Buns

Friday, November 16, 2007

Kipferl

Kipferl is an almond vanilla cookie hailing from Germany. From what I've managed to find out, it is a Christmas cookie shaped like a crescent that is eaten with tea and jam but I think you could eat these little delicacies anytime morning, noon and night.

The dough is similar to a sugar cookie with the addition of ground almonds. After a brief chilling period, they're shaped and baked. I think some of my crescents look like "U"s and "C"s. It took me some time to get them all looking similar. They do take a little extra effort and my dough got really hard so I had to soften it up to keep from crumbling. Once they come out of the oven , they're dusted with more sugar and ready to be enjoyed.

Kipferl has a distinct and pronounced vanilla flavour while the almonds add a gentle undertone. They browned considerably after 12 minutes so watch them closely. The cookie texture is like a sugar cookie but the ground almonds add a bit of texture. Overall, I really liked making and eating the Kipferl. They taste really fabulous the next day or even the day after after the flavours have had a chance to mingle. Again, they would make an interesting and tasty addition to any cookie tray.

Recipe: Kipferl

Wednesday, October 31, 2007

Snickerdoodle Croissant Cookies

Here's another cookie from the BHG Christmas Cookie publication. Snickerdoodle Croissant Cookies are a fancy name for what is typically known as rugelach. The cookie consists of a cream cheese dough that is chilled, rolled and sprinkled with a sweet filling. Once this is done, the dough is cut into wedges and rolled up to resemble croissants.

This particular cookie dough was easy to work with. It rolled out well with a little help from some flour. The filling was fairly simple, consisting only of brown sugar, cinnamon and pecans. The recipe called for each circle of dough to be cut into 12 wedges. I decided to do this by cutting the dough like pizza slices but you can't get twelve even pieces if you keep dividing the sections so I ended up with some cookies that were larger than others.

Overall these cookies were tasty and worth the little extra effort you need to make them. The cream cheese dough really stands out with its tangy flavour. I would have liked a punchier filling as cinnamon sugar is really mild but it was meant to mimic a Snickerdoodle cookie which it did especially well. This is a cookie that can be filled a multitude of different ways and would look very nice on a cookie tray.

Recipe: Snickerdoodle Croissant Cookies

Friday, October 26, 2007

Old Dad's Oatmeal Cookies

I made these cookies quite a while ago but have been procrastinating about posting about them. It's not that I don't like them, its just that I haven't dedicated any proper blogging time into my schedule. Now, with a little time to myself and some Radiohead, I can finally get down to business.

The reasons I like these cookies:

1. They use almost 3 cups of oats. Now that's a real oatmeal cookie.

2. They're sturdy and versatile. Leave them plain or dress them up. Turn them into ice cream sandwiches. It's all good.

3. They're easy, fast and mixes up in one bowl.

The one thing about using Crisco is that sometimes when you have a plain cookie like this one, the flavour can become flat and tasteless so you really need to add the salt called for in the recipe. I also used cinnamon to jazz up the flavour which is totally optional - it just depends on what you like. The recipe makes a lot of cookies so invite some friends over and share. Or have a Hallowe'en party, add orange and dark brown M&M's and call them Super Crunchy And Really Yummy (SCARY) cookies.......or not.

Recipe: Old Dad's Oatmeal Cookies

Tuesday, October 16, 2007

Cappuccino Love Bites

The holiday season is quickly descending on us. I know this because I see Christmas cookie magazines everywhere I go tempting me with pretty goodies on the cover. I finally broke down and bought the BHG Christmas Cookies publication promising 102 yummy treats. This was in no way an impulse buy ( OK, maybe a little) but I have faith in BHG as I've bought previous holiday issues. Also, I just really love looking at new baking recipes - always fun and inspiring!

Well, let's just say the magazine didn't disappoint. It's filled with tons of fabulous recipes and I decided to make these Cappuccino Love Bites because I know that Mr. CB adores coffee and I don't use nearly enough coffee flavouring in my baking. Turns out, these little cookies were a hit, with young and old alike.

Making the cookie batter is straightforward. Once it is prepared, it is rolled in a mixture of sugar and instant coffee granules. Once they've baked, a kiss is popped on top and, after it melts a bit, swirled for fancy effect. Mr. CB thought this would make the cookie too sweet but he pleasantly surprised that it didn't. The coffee granules offer a bit of bitterness which is nice with the sweet creamy chocolate. If you don't like coffee granules, you can adjust the sugar/granules ratio to your liking.

Overall, I give these cookies an enthusiastic thumbs up. They look interesting and taste great too. I'm looking forward to making them again and again and again....

On another note, I'd like send a shout out to my fabulous and amazing in-laws for gifting me with what every baker covets - a KitchenAid Artisan Stand Mixer. Thank you, thank you! Oh, the treats I can make (and send to BC)! xoxo

Recipe: Cappuccino Love Bites

Friday, October 05, 2007

Apricot Coconut Almond Squares

I can't remember why I bought the bag of apricots that has been languishing in my pantry cupboard. There were a lot of them at one point but the stash has diminished greatly due to voracious snacking. I like dried apricots - they're chewy, healthy and easy to bake with. I also found a lonely bag of coconut so I decided they'd be good friends and threw them together into one tasty bar.

To make this bar cookie, you need to soften up the apricots by simmering them in a liquid. I chose water but you could also add more flavour by using orange juice or Citrus Five Alive - whatever you fancy. Once they're a bit mushier (but not like a puree) you mix it up with a whole bunch of other good stuff and bake it over a shortbread crust. I was unsure how they would come out but I needn't have worried.

After 30 minutes they were done and a nice light shade of brown. I let them cool for a bit and them sliced them up into neat squares. So far so good but, as they say, they proof is in the pudding or eating or something. The bars were surprisingly delicious. I knew they'd taste good, but not this good. They buttery crust went together amazingly well with the sweet chewy apricot filling. I chopped my apricots a little larger so I had nice big chunks intermingled with coconut and crunchy almonds. A winner on all accounts. They're perfect for a dessert tray and if you throw in some dried cranberries, they'd look even prettier.

Recipe: Apricot Coconut Almond Squares

Monday, October 01, 2007

Daring Bakers September Challenge - Cinnamon Buns

With every new month comes a new and exciting Daring Baker challenge. Alas, I am a few days late in posting about September's treat-of-the-month so it is no surprise that Cinnamon Buns and/or Sticky Buns were the order of the day.

Let me start by saying that I love making cinnamon buns. Once the apprehension of using yeast evaporated, making these yummy swirls of cinnamony goodness were a breeze. I especially liked the recipe that Marce from Pip in the City had us use. It produced a fabulous dough that was both soft and airy. I have made buns in the past with a different recipe and noticed that sometimes the dough ended up cakey and hard, but not this time. I was really quite impressed with the final result.

One thing I though made these buns more special was the addition of lemon rind into the dough. It gives the buns an extra flavour dimension but not so much that the lemon is overpowering. I also liked the simple cinnamon sugar filling. It was light and didn't overpower the bun. I suppose if you like, brown sugar mixed with cinnamon would give you a more substantial filling - it all depends on what your tastebuds like.

Overall I can't say enough good things about these buns. The dough was a dream (though I had to add extra flour) and they came out perfect even though I was pressed for time and had to reduce the proofing times somewhat. One little thing I tweaked was to warm up the milk before adding it to the mix. I just thought this would help the yeast do its magic and I'm just so used to doing it anyways. This was my favourite DB challenge by far and and I am officially adopting Marce's recipe as my own. It's great. Period.

To see the other gorgeous buns made by my fellow Daring Bakers, check out our growing blogroll. To see the complete recipe, please visit Marce.

Wednesday, September 26, 2007

Cheddar Mustard Muffins

Now that autumn is in full swing, my focus on
on meal planning has taken a turn towards comfort food. Nothing is more welcome on a cool crisp day than a steaming hot bowl of soup or chili. I enjoy cool weather cooking because it means I get to use my slow cooker a lot more and along with the stews and such, it is nice to have a baked accompaniment for dipping.

I made these Cheddar Mustard muffins to have with lasagna. They're chock full of cheese, grainy Dijon, red peppers and freshly ground black pepper. To make these, I used my Spice Depot black pepper grinder. What is a Spice Depot grinder, you ask? It is a typical spice bottle that has a grinder under the lid so all you have to do is turn it upside down and twist. Voila, fresh and instant spice! What I like about the grinder is that the pepper comes out coarsely so it adds not only flavour, but texture to the muffins. I was able to also put a quick sprinkle on top of each muffin for added colour. The grinder was very useful and you use only what you need, so the spice is never stale.

The muffins were very piquant. There were a lot of complementary flavours present and would be enjoyed by those who like assertive seasoning. I didn't use smooth Dijon and I suspect that the muffin would taste quite different from using grainy mustard. I prefer grainy as it looks and tastes nicer. So next time you want something other than a crusty baguette, try these out. They're easy and flavoursome!

(Disclosure: I was provided (with thanks) a bottle of each Spice Depot Black Peppercorns, Sea Salt and Salad Seasoning.)

Recipe: Cheddar Mustard Muffins

Wednesday, September 12, 2007

Prize Winning Apple Pie

I would like to say that I won a prize for making this pie, however I did not. Grandma Thompson's Prize-Winning Apple Pie is the official name of this recipe and was made by Brenda Hall from Collingwood. She won the prize, not me.

The making of this pie is very appropriately timed. There is a coolness in the morning breeze signaling the coming of Autumn and orchards are beckoning us to come 'pick your own'. In order to enjoy the abundance of fresh Ontario apples, I went to Chudleigh's Apple Farm to marvel at the numerous apple varieties they offer and to enjoy one of the last beautiful days of summer.

The apples that were available for picking the day I went were Ginger Gold and Wealthy. I had never heard of either and was excited to go out into the orchard to pick them straight off the tree. We were told that two apples equaled a pound and they sure were huge! Nothing beats eating a crisp, juicy apple off the tree - the Ginger Gold was gorgeous and I picked a bagful of Wealthy apples to take home and bake with.

I decided to try a different apple pie recipe from my usual one. The crust called for sour cream and lard. As I don't have lard on hand, I replaced it with all vegetable shortening. I don't know how much of a difference this had on the final product, but I find that you can make a great crust using butter and shortening. The only mistake I made was slicing my apples too thinly. Next time I'll make them thicker so that they don't make the filling all mushy. Overall, the pie was enjoyable - the crust was nice and the filling was spiced perfectly.

If you have the opportunity to pick your own apples I highly suggest you do! It's lots of fun for everyone and if you get hungry, no problem, eat an apple. Just watch out for all those pesky bees - they're in apple heaven.

Recipe: Prize Winning Apple Pie

Monday, September 03, 2007

Chocolate Mayonnaise Cake

You've all seen the recipe on the label of a jar of mayonnaise - Chocolate Mayonnaise Cake. Hmmm, you thought. How would that taste? Would it taste mayonnaise-y? I decided to make the cake for myself to see how it would turn out. Mind you, I didn't use a box of chocolate cake mix as the recipe suggests. I had a different recipe that specifically called for mayonnaise which I thought would give me a better idea of how the mayonnaise flavours or doesn't flavour the cake.

My decision to make this cake coincides with a country-wide Hellmann's Taste Test that asks Canadians whether or not they can tell the difference between Real and Half The Fat mayonnaise. I always buy real mayonnaise but, to be fair to the general idea of the taste test, I made two cakes using both types of mayo. It was up to my taste-testers to see if there were any discernable differences.

The first difference I noticed was in appearance. Real mayonnaise is thicker and scoopable whereas Half the Fat is creamier. When incorporating it into the cake batter, the Half the Fat mayo dissolved very smoothly. Both cakes baked up exactly the same way in exactly the same amount of time. The interesting thing about the recipe I used is that it doesn't require butter at all - the mayo completely replaces it. Once the cakes were frosted, it was time moment of truth. Would one taste better than the other?

The result? Both cakes tasted the same. They were both moist and chocolaty with no mayo flavouring evident at all. I knew which cake was which but, if someone was presented with two slices I don't think they would have been able to tell the difference. I've concluded that, in this particular cake, both types of mayo worked equally as good as the other. There was no sacrificing of taste and, if you're counting calories, Half Fat mayo cake would be a reasonable dessert choice, icing being optional.

To see if there's a taste test going on in your neck of the woods, check Hellmann's for details. They're running until September 23 at a grocery store near you.

(Disclosure: In anticipation of this event, I was provided (with thanks) a jar of each Hellmann's Real Mayonnaise and Hellmann's Half the Fat.)

Recipe: Chocolate Mayonnaise Cake

Wednesday, August 29, 2007

Daring Bakers August Challenge - Milk Chocolate & Caramel Tart

Another month has come to a close which signals that a new Daring Bakers challenge has been completed. This month our feature presentation was a Milk Chocolate Caramel Tart chosen by Veronica of Veronica's Test Kitchen and Patricia of Technicolor Kitchen. I was quite excited to try it out since milk chocolate and caramel are two of my favourite flavours.

The tart consists of three elements - a hazelnut/chocolate crust, caramel filling and milk chocolate mousse topping. All three parts are easy enough to produce on their own. The dough rolled out beautifully for me and did not puff up at all when it was blind-baked. The caramel was fun to make as well and this time I didn't look away at all and the result was a beautiful golden butterscotch colour with taste to match. The mousse was a breeze as well and only required folding together melted milk chocolate and whipped cream.

As I assembled the tart, I realized my caramel was runny and it did not set up overnight. It was a fantastic consistency for pouring over ice cream or dipping strawberries but not for a tart filling. Once it was cut, the caramel oozed out so there are no cut pictures to show.

Despite the flowing caramel, I really enjoyed the flavour of the tart. The crust added a crunch to the smooth caramel and fluffy mousse. I'm not sure if I'd make it again but now I know that I would really like to get myself a proper tart pan! To serve the tart, I just spooned the caramel over the slices when I served them. It's a big sweet tart so hopefully you'll have plenty of people to share it with.

To see the beautiful creations made by other Daring Bakers please go here. To see the complete recipe, check out Veronica's post here or Patricia's post here.

Thursday, August 23, 2007

Baci di Dama

Have you ever had a recipe that you've always wanted to make but never got around to? I'm sure most of you can empathize with my sentiment; having a recipe that wouldn't (or couldn't) go away because it was stuck in the recesses of your brain waiting to become real. For me, the recipe was Baci di Dama and finally after years of waiting, these cookies became a reality.

"Lady's Kisses" are a very apt name for these little buttery almond cookies. They're light and sweet, but getting the perfect one can sometimes be elusive. Normally, I don't have a lot of trouble making new types of cookies but these ones were like trying to get a kiss on the lips, failing and settling for a kiss on the forehead instead.

The dough for the Baci di Dama is very dry and crumbly. It requires a lot of squeezing to be able to be rolled into a ball for baking. Once they were all lined up like marbles I baked them for the suggested 12 minutes and got a some darkly burnt ones and some flat cookies. I sort of panicked when I took them out wondering how I could get so many cookie shape variations on one try. For the second batch, I reduced the baking time by two minutes which made a huge difference and picked out the better ones to fill with Nutella. Overall, the cookies were fantastic to eat. They were delicate, sandy and not too sweet. I could have eaten them plain, but filling them with chocolate is what you're supposed to do and it makes for a much nicer presentation. I would definitely try to make these again and if you do try to make them, have patience - it takes a bit of time to roll out all those teaspoon-sized balls!

Recipe: Baci di Dama

Wednesday, August 15, 2007

How-To: Plum Crumb Cake

As August draws us closer to September and farther from July, the last of summer's fruit makes an appearance ready to be enjoyed before apple season. One fruit that is both versatile and widely available in Ontario is the plum. With it, a veritable cornucopia of delicious desserts can be created and savoured while awaiting the arrival of Autumn.

I decided to make a Plum Crumb Cake because it is the type of cake that my family loves. It also makes a large 9 x 13 cake so there is plenty to share. This cake is fluffy and lemon-scented, topped with juicy red plums and crowned with a buttery brown sugar crumble. For this recipe I've added some step-by-step directions to show the process of making this cake from start to finish. I hope some of you will find this helpful.


Step One


Cream the butter and sugar together. Add your eggs and you should have a pale yellow mixture, close to the consistency of icing.


Step Two


Alternately add the sour cream and dry ingredients into the butter mixture.


Step Three


Your final batter should look like this - thick yet not stiff. Scrape the batter into your prepared pan.


Step Four


Place the sliced plums decoratively over the batter.


Step Five


Sprinkle with the crumb topping. Pop it in the oven and in less than an hour, you'll be enjoying some lovely cake!


Recipe: Plum Crumb Cake

Monday, August 13, 2007

Lemon Tea Cookies

A couple weeks ago, my neighbour, Little Man, turned three and his mom decided to have a small gathering for cake cutting and presents. After making a chocolate cake for him, I wanted to make something non-chocolate for the adults, specifically his grandmother who, like my own mom, loves lemon. As this was a last minute decision, I had to find something lemony, quick and tea-worthy.

I wanted something crispier than a drop cookie and I found the perfect cookies in a seven year old publication from BHG. Essentially, the cookie is lemon shortbread topped with lemon glaze. The recipe does not mention re-rolling scraps which you inevitably end up with if you cut out circles. I hate to waste dough so I re-rolled as gently as possible to max out my cookie output. Normally, I don't find too much of a difference in cookie texture when I do this, but this time I could tell the first rolled cookies from the last. The last lost their easy flakiness and were noticeably 'tougher' or as tough as a shortbread cookie can become. The glaze in the recipe calls for specific items which I didn't have so I used lemon juice mixed with icing sugar and, to punch up the colour, a little yellow paste colouring with hot pink sparkles. One thing I liked was that you could roll out the dough right away without any chilling time. Overall, the cookies were good but not mind blowing. They're quick, easy and perfect for novice bakers.

Recipe: Lemon Tea Cookies

Monday, August 06, 2007

Coconut Almond Macaroons

After using egg yolks for the failed Bavarian cream I made last month, I was left with egg whites that had macaroons written all over them. Why macaroons, you ask? Because I love macaroons! I love the chewy coconut texture and the burst of sweetness that fills your mouth when you bite into one. I especially love them more when they're dipped in glorious, effulgent chocolate.

These macaroons are made by whipping up egg whites and folding them into a dry mixture which consists of coconut, lemon zest and ground almonds. If you're new to whipping egg whites, just beat them with your mixer until they increase in volume, become opaque and the peaks hold their shape when you pull the beaters out. (They don't flop over like the top of a jester's hat. A little flop is okay but not a lot.) Bake them in the oven and soon you'll be enjoying some delicious cookies.

I made these cookies on a hot day with no AC so I had to store them in the refrigerator once they were dipped to avoid meltage. The final product was wonderful - crisp on the outside, chewy on the inside with a hint of lemon. Macaroon heaven - enjoy!

Recipe: Coconut Almond Macaroons

Monday, July 30, 2007

Daring Bakers July Challenge - Strawberry Mirror Cake

And the Daring Bakers are off again! This month the challenge was decided on by the demiurgic Peabody from Culinary Concoctions. She chose to have us all make a Strawberry Mirror Cake and, after reading about the wonderful cakes my fellow DBs made, I was very tempted to not post my final result.

The recipe was long and technical. If broken down into manageable components, this was an easy hurdle to overcome. After planning and buying all the necessary ingredients, I got to work. I was not too worried about the cake but, the cream and mirror held some additional challenges as they contained gelatin, a product I don't use. After finding agar agar, I had to hope it would work just as well as its animal counterpart. I was tempted to use some sort of Jello product but as you can see, I didn't! Sticking to a recipe is one thing I do very well.

After making the cakes, which were thin-ish I tackled the cream, stirring in the agar agar to measure the same as gelatin. I should have dissolved it completely in hot boiling water as there were some hard bits in the final cream. When I layered it in the pan with the cake I was hoping it would keep its shape, which it did. Yeah!

Now I don't know if I should have waited longer before pouring on the mirror but when I did, the smooth strawberry liquid disturbed the cream creating swirls. I was stumped and couldn't take it off so I kept pouring hoping for the best. After refrigerating it, I had a pink-topped cake with a mirror which had mysteriously sunk to the bottom of the cake. I tasted it and it had a gel-like consistency so the agar agar worked, though, unfortunately the mirror was on the wrong end.

Looking back at my experience, I would now modify the cakes to be baked in two round pans as opposed to one large pan with the cake circles being cut out. The rest would stay the same. I was initially hesitant to try it at all because of the ingredients but I'm glad I did. The challenge made me go out and look for ingredients I normally wouldn't have in my cupboard. Making gelatin-based desserts is new territory for me so I'll have to keep plugging away until I can master it.

Overall, I'm not sure if I can appreciate the flavour of the cake. Those who tried it said it tasted good and reminded them of trifle. I'm hesitant to give my version a two thumbs up as I'm sure I could do it better next time. I was also a little bummed about the mirror and the hard flakes - two things which greatly coloured how I saw this particular cake.

Thanks to Peabody for your bold choice! A big thank you goes out to all the Daring Bakers whose support and encouragement cushion the blow of disaster. Please visit Peabody's site for the full recipe and to see what all the other brilliant Daring Bakers created, click here. Looking forward to next month!

Tuesday, July 24, 2007

SHF 33 - Pineapple Coconut Cookies

Tropical Paradise is the theme for the 33rd edition of Sugar High Friday. Mary at Alpineberry wanted us to come up with something that said 'tropical' to us and write about it. The best way I could bring the tropics home was to make use of island fruits, notably coconut and pineapple.

These cookies come from the book Ripe for Dessert by David Lebovitz. I instinctively looked through this book first because he has organized his book by fruit and chapter two was entitled Tropical Fruit - perfect for this challenge!

The recipe is super simple to pull together and makes use of everyday ingredients. The cookie is sort of like a macaroon, crispier on the outside and soft and chewy on the inside. I had to decrease the baking time by ten minutes but if you like a more browned cookies, then you can leave it in for the full 30 minutes.

The baked cookies packed a pineapple punch! The caramely flavour of sugared pineapple melded nicely with the chewy coconut. They were moist and small enough to pop in your mouth. David Lebovitz said this was his favourite current pineapple coconut cookie and, although I'm still undecided on this, my taste-testers seemed to like them a lot. If you'd like, dress them up with a drizzle of chocolate or a sprinkling of powdered sugar. No matter what you do, these cookies have Tropical written all over them!

Recipe: Pineapple Coconut Cookies

Friday, July 13, 2007

Bubble Bread

If you want to impress friends and family, making a Bubble Bread is the way to do it. This fun-to-make bread consists of a yeasted sweet dough that is rolled into golf ball-sized chunks, then rolled in butter and cinnamon-sugar and arranged in a Bundt pan. After it had risen, you bake it and devour the sweet cinnamony morsels that have been drizzled (or not) in a sugar glaze.

When making this bread, give yourself enough time to make the dough and let it rise. I think it took me about 2 hours from start to finish with no dilly-dallying. The final result looks really neat - sort a cross between cinnamon buns and a Bundt cake. It is also fun to eat and the portions are smaller so, in theory, the guilt factor is as well. It's like eating a Timbit instead of a whole doughnut, you know? I've included some modifications to the recipe in the recipe link below just for reference. I know some of you may be weary of working with yeast and I totally understand where you're coming from. But, if you're looking to challenge yourself this is a yummy way to get started.

Recipes: Universal Sweet Dough & Bubble Bread

Monday, July 09, 2007

White Butter Cake

Alas, strawberry season had almost come to an end here in Ontario. This past weekend at my local Farmer's Market signs were posted saying "Last Berries of the Season!". I took advantage of this final moment to buy some small, but very red berries to make a Strawberry Shortcake-type cake for a BBQ I had yesterday.

The component of this cake I wanted to post about is the White Butter Cake which I used as a base for whipped cream and strawberries. It is a great cake for filling with pretty much anything you like and has a lovely hint of orange due to the addition of rind in the batter. It makes a 9 x 13-inch cake, perfect for picnics and large crowds. I made it the day before we ate it and it was moist, dense and yummy. The recipe is a little different from the traditional creaming method, but as long as you have a big enough bowl, you shouldn't have any problems.

Recipe: White Butter Cake

Sunday, July 01, 2007

Lemon Poppy Seed Muffins

Finally summer holidays are here and I've caught a chance to put a post up. I know, Lemon Poppy Seed Muffins aren't all that exciting but I just wanted to let you all know I was still here and am hoping to do more frequent blogging in the near future. My in-laws are visiting from North Vancouver, British Columbia as well so things have been exciting here in the Canadian Baker household.

These muffins are as you would expect - moist and lemony made slightly sticky with a lemon glaze poured over top. You can whip these up in 10 minutes and you can add more or less poppy seeds to your liking. They're not fancy at all and there are probably better recipes out there but I enjoyed them with some hot tea. The poppy seeds were crunchy and lingered on well after the muffin was finished. They also freeze well wrapped individually in plastic wrap and tucked into a Ziploc bag.

To those of you in Canada, Happy Canada Day! We'll be enjoying fireworks tonight!

Recipe: Lemon Poppy Seed Muffins

Saturday, June 16, 2007

Custard-Topped Berry Kuchen

First, let me start out by saying there is no custard on this kuchen. I had a bit of a springform pan mishap in that it popped open when I took the kuchen out to pour on the custard and it wouldn't close. It just kept snapping open - I don't know why. So I sighed and scrapped the topping even though I was really looking forward to it.

Despite that little problem, this kuchen turned out to be a fluffy and moist berry cake all on its own. The lemon-scented batter is surrounded by juicy berries and with a sprinkle of icing sugar, makes a nice light dessert. The batter is make like most other cakes by creaming butter and sugar and then adding the wet and dry ingredients alternately. My mom really liked this cake and suggested that a scoop of ice cream would make it even better.

I have included the entire recipe and hopefully if you make it you'll be more successful than I in the making of the custard. :)

Recipe: Custard-Topped Berry Kuchen

Sunday, June 10, 2007

Orange Carrot Bundt Cake

The other evening I went to Starbucks with some friends. If you're familiar with this oh-so-popular coffee joint you'll have noticed they have an orange theme going on right now which includes an orange cream cake. I'm not sure this is the correct name but the cake tastes like a creamsicle popsicle. (Vanilla flavored ice cream on the inside with an orange sherbert flavored shell.) I told my friends I wanted to try and recreate it and they promptly reminded me that there was an orange cake on the cover of Canadian Living that looked yummy. I took the hint and gave it a go.

Just so you know, this cake tastes nothing like a creamsicle. It is a classic tea cake with a good crumb and pretty little flecks of orange from the carrots. The more assertive flavour is the orange and the carrot acts as a compliment to it. It doesn't taste like a typical carrot cake at all. The cake baked up in my oven in exactly an hour and once iced with the yummy tangy glaze, it sure was a sweet treat. Just one note, this cake sliced much cleaner the second day so baking it one day before you're going to eat it wouldn't be a bad idea.

Recipe: Orange Carrot Bundt Cake

Friday, June 01, 2007

Mostaccioli

Do you ever feel more connected to a country after you have visited it? I know it sounds silly, but after visiting Italy last summer I have created a kinship for this beautiful European country. I wasn't there long and can't speak Italian for beans but my time spent there was so memorable that whenever I see recipes with Italian heritage I get excited.

Case in point; these cookies called Mostaccioli (not to be confused with the same-named pasta) hail from Italy. According to the little blurb preceding the recipe, "In Roman times, these cookies were sweetened with the must, or mosto, left over from wine production." I believe that in Italy this method is still used though the recipe from Canadian Living is more accessible for those of us unable to find mosto.

The method for making these cookies is very straightforward. First you create a fragrant and spicy cocoa dough, chill it, roll it into balls, bake them and finally glaze them. I think I made my a little too large or as my friend refers to as "North American" sized. Still a good size for espresso or a latte. So if you're looking to make a cookie with kick try them out and enjoy a little taste of Italy.

Recipe: Mostaccioli

Sunday, May 27, 2007

Daring Bakers May Challenge - Gateau Saint Honore

For this month’s Daring Bakers challenge, Helene of Tartelette and Anita from Dessert First asked us to dust off our rolling pins to make a Gateau St. Honore. This decadent confection consists of a puff pastry base topped with Saint Honore Cream (Diplomat’s Cream) and finished off with caramel-topped cream puffs and swirls of whipped cream. Wow, this was French baking at its best. The recipe was long but not complicated and, as long as I gave myself enough time, I would be able to pull this off.

The puff pastry component could be made one of two ways; either store–bought or homemade. I opted for the store made version because I had some in my freezer already. The rest of the recipe required me to do it all myself. I had never made choux pastry before and it wasn’t difficult to do. I think I made my puffs a little too small but they came out okay nonetheless. The Diplomat cream was also straightforward although I ended up with a slightly runny product; something some fellow Daring Bakers also experienced. For this reason, I was unable to fill the cream puffs with the cream though I made a bit of a mess trying. The final product looked impressive and it tasted nice.

Even though the recipe didn’t come 100% perfect I’m really glad I put in the effort to try it. This is the major appeal of the Daring Bakers for me – to make new desserts that I would probably never had made on my own. And the camaraderie of the other bakers is just icing on the cake. To check out all the other creations just click on the sidebar to the right.

Monday, May 21, 2007

Mocha Brownies

Oh my, I can't believe that May is passing by so quickly. Today is already Victoria Day where most Canadians are relaxing or planting flowers on a well deserved day off. It is beautiful and sunny where I am and to celebrate I made some Mocha Brownies.

I remember a time when I was terrible at making brownies. I would always overbake them and would be left with a chocolate brick. I always avoided making them for fear of failure. If you feel the same way, not to worry; these brownies are super simple to make and have a pleasing coffee flavour.

Most mocha-type desserts call for just a hint of coffee flavour but for these brownies I used freshly brewed espresso and coffee granules. They came out great - chewy on the inside and topped with a glossy, crackly crust. For a nice final presentation, I topped them with a dollop of whipped cream and a coffee bean.

Even if you're not on holiday today I hope you're having a great day wherever you are!

Recipe: Mocha Brownies

Thursday, May 10, 2007

Best-Ever Chocolate Chip Cookies

You would think that finding a really good chocolate chip cookie recipe would be a simple task. I've tried many with varying degrees of success and I envy those of you who have had recipes handed down to you. I, however, do not have much of a baking legacy in my family so I rely on my books to help me out.

This recipe comes from Canadian Living and I have tried it many times before with lacklustre results which I why I'm only posting about them now. I never thought they were great, let alone best-ever, but yesterday I made some because I had all the ingredients. I had to refrigerate the dough because dinner was in the oven and this simple step made all the difference.

The cookies came out nicely rounded and definitely not like a flat frisbee. The chilling helped the cookies retain their shape so they were still rounded and nicely puffed. I was pleasantly surprised when I pulled then out of the oven and when I sent out two dozen to the kids in the backyard they were gone in 30 seconds. Really, they were. So I've learned not to give up on recipes that don't turn out perfectly the first time. Sometimes all it takes to wreck a batch of cookies is a bad mood and sometimes all it takes to make a good batch is a positive attitude.

Recipe: Best-Ever Chocolate Chip Cookies

Thursday, May 03, 2007

Lemon Curd

When I was young, my mom always used to buy the packaged lemon tarts sold at grocery stores - the kind that were in a tray of six and were bright neon yellow. I always wanted the butter tart version (which we sometimes got) but more often than not, the lemon tarts would end up in our cart. I hated these tarts. I thought they were too tart (heh) and I was not a lemon lover at all. Boy, how times have changed.

After making the crepe cake last week, I was left with six egg yolks that I didn't want to waste. I decided to make curd because it was something I'd always wanted to try and, now that I'm older, I appreciate the tangy goodness of the lemon.

Well, the curd was beautiful to make. Slowly it became thicker and thicker until it was ready. I covered it with plastic wrap and chilled it overnight. The next day I tried it and it was rich, thick and tangy - exactly as you think curd would taste. I decided to be English and make scones to have with it. It made the perfect teatime snack though, if you are not fond of strong tart flavours, the curd may be too much for you. So I've learned that as we change, our tastes change with us and, for the most part, this is always a good thing.

Recipe: Lemon Curd

Sunday, April 29, 2007

Daring Bakers April Challenge - Darkest Chocolate Crepe Cake

Well, I’m finally done. Those Daring Bakers are really putting me to the test and this month’s challenge was no walk in the park. Brilynn of Jumbo Empanadas decided to test our culinary skills by asking us to make a Darkest Chocolate Crepe Cake from Martha Stewart. As I looked at the four-page recipe, I had inkings that this was not going to be any ordinary cake. I thought the recipe looked a little wacky and perhaps that’s why I procrastinated and left it to the last few days in April.

The cake is made up of three components; chocolate crepes, hazelnut crème filling and chocolate ganache. The crepes were a breeze to make though I had to do a little trimming to make everything circular. They didn’t stick or rip which I am very thankful for. Out of the 36 I made, I only ended up using 18. The crème was a little labour intensive but not difficult. It is a meringue-type hazelnut crème for which I used hazelnut butter instead of hazelnut cream. It was light and airy like a mousse and tasted very yummy. The difficulty started when I began assembling the cake.

After the crepe/crème tower was complete, it started to lean which freaked me out. (Had the filling been more like an icing, this probably wouldn’t have happened.) Filling was spilling out everywhere so I propped it up with 4 straws and put it in the fridge, took a deep breath and made the ganache. I cleaned up the cake as best I could and covered it in the chocolate. The final result is not very even or flat on top. It’s more dome-like but I finished and I was relieved, though slightly frustrated.

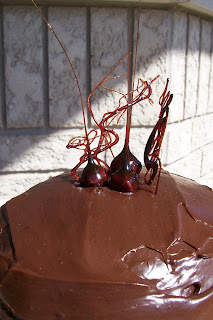
Well, the final result (including taste and appearance) turned out okay. The layers are not ultra distinct but you can see them. I also made the candied nuts to put on top. As you can see from the picture, I turned my back on the sugar for a second and it got very dark amber. I thought that since it was just for decoration I would use it. I don’t think I’ll ever make this cake again and I truly believe the parts are much better than the sum product. Everything tasted nice, but perhaps not all together. Overall, I’m glad I tried it. I’m also glad I have a neighbour with family over who I could share the cake with. If you’d like to see what the other Daring Bakers came up with, just click on the links in the sidebar. There are some truly spectacular cakes to behold!

Wednesday, April 25, 2007

Dutch Butter Bars

Spring has finally sprung in Ontario. Tulips are almost blooming and buds are appearing on my lilac bush. Along with the good weather comes busy times at work and less time to bake. I did, however, find time to make some bars which I will share with you.

Dutch Butter Bars (known in Dutch as boterkoek) are a simple satisfying bar. They're reminiscent of shortbread and have a chewy texture. The almond flavouring compliments the buttery bars very well and the scattered almonds on top add some crunch. Just remember, overbaking will make the bars too crispy. I didn't overbake, but my edges were still well done, almost like biscotti. Also, the consistency of the dough was more like cookie batter. It was not spreadable so I had to pat the dough into the pan.

Overall, the bars were tasty and I would make them again and bake them for a little less time. For some sparkle, sprinkle coarse sugar on top and enjoy with a nice hot drink.

Recipe: Dutch Butter Bars

Monday, April 16, 2007

Maple Nut Upside-Down Cake

This past weekend I found myself with enough free time to get engrossed in baking. The house was quiet and clean - ideal for trying something new. I had already picked out what I was going to tackle - Maple Nut Upside-Down Cake.

After looking through my cupboard earlier, I found about five different types of nuts waiting to be used; macadamia, pine nuts, walnuts, pecans and almonds. A perfect combination for a mix. After reading the recipe, I saw that it was assembled just like any other upside-down cake; by creating a syrup, sprinkling with nuts and topping with cake batter. An interesting thing about the cake was that it used no butter or oil. I couldn't remember the last time I made a cake with no butter but I had a feeling it would be just fine.

Well, the cake didn't disappoint. It looked pretty impressive with the glazed nut top and it was easy to lift off the pan. The syrup soaked into the cake making it moist and sweet. I found that it tasted even better the second day after all the flavours had time to settle. You can use any mixture of unsalted nuts you like and if you top it off with some whipped cream, you'll have a fabulous dessert to share with friends.

Recipe: Maple Nut Upside-Down Cake